Monday, November 28, 2011

Hair/Fiber Analysis

History of Hair/Fiber Analysis:

Forensic hair and fiber analysis was developed into an established science in the early 1900's. Publications by John Glastier and John Hicks made it possible for the scientific community to realize that hair and fiber analysis was no pseudoscience and was actually valid. Since then hair and fiber analysis has fluorished, and testing ranges from identifying the type of hair or fiber to DNA.

Major Types of Fiber:

Cotton- Cotton is a type of organic or natural fiber that is soft and fluffy. It is made out of almost entirely pure cellulose.

CottonPlant.JPG

Nylon- Nylon is a synthetic fiber which is often used for certain articles of clothing. It is one of the most commonly used polymers in the world.


Polyester- A category that refers to polymers that contain the ester funtional group, but most often refers to  polyethylene terephthalate. Polyester is used in things from clothing to household materials such a linens.


Silk- A natural protein fiber which can be woven into textiles, Silk is obtained from the cacoons or larvae of the Mulberry Silkworm.
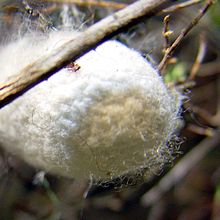


Wool- Wool can be obtained from different types of animals, but most commonly sheep. It is a fiberous protein and is considered to be very crimpled and elastic.


Methods for Collecting Hair/Fiber:

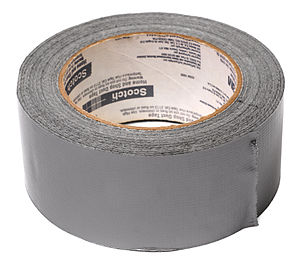
There are a few different ways to collect hair and fiber from different surfaces. If you're looking for an individual fiber in an iscolated location you can use tweezers. One method which involves carpet uses duct tape, which is ripped from the carpet to collect different fibers that were caught in the fibers of the carpet.


Analyzing Hair/Fiber:

To analyze the visual properties of hair and fiber you simply put a dry piece of hair under the miscroscope and observe. You can tell what type of hair it is and if it has any damaging from pulling or coloring. To test for the DNA properties of the hair you would have to do further chemical testing on the sample.
Tuesday, November 22, 2011

Fingerprinting

History of Fingerprinting:


Did you know that before fingerprints were used for solving crimes people used them as personal identifiers, kind of like signatures? Fingerprints have been found in the tombs of Egypt to Chinese pottery. In 1684, Nehemiah Grew published the first scientific document describing fingerprints, and in 1788 Johann Mayer recognized that fingerprints are unique in each individual. In 1880 a doctor proposed the usefulness of finger prints for identification and recording them by using a ink method. It was said the chance of a "false positive" or two individuals having the same fingerprint was 1 in 64 billion. It wasn't until 1892 when Francisca Rojas was being accused of killing her two sons that fingerprints were used to convict an individual when a bloody thumb print was found that was identical to Rojas's. The fingerprinting method was soon adopted by many large city police departments, and would become one of the most basic protocols for the booking process.


Types of Fingerprints:


Exemplar: Prints deliberately collected from an indicidual


Latent: Any prints collected from any accidental impression left by friction ridge skin on a surface, and may or may not be visible to the human eye.


Patent: Patent prints are visible to the naked eye and occur when a finger leaves print on surface because it has some kind of foreign material on it.


Plastic: A print that is left on a material that retains the actual shape and detail of the fingertip itself.


Methods for Collecting Fingerprints:

Although there are thousands of methods for collecting fingerprints, there are only about 20 methods that are used most frequently. Chemicals such as Ninhydrin, which reacts with ammonia or primary and secondary amines, can be used on multiple types of surfaces to collect prints. Traditional powder methods are good for typicaly smooth surfaces. To get prints from a porous material evaporation methods can be used to get reactive chemicals in pores or cracks.

Basic Shapes and Patterns:

 
Arch
 
 
Loop
 
 
Whorl
 
 
Tented Arch
 
 
Procedures for Lifting Prints: (Mineral Powder Method)
 
-Find area you're interested in lifting prints from
 
-Carefully and delicately dust the selected area, making the powder stick the oils left behind from the print
 
-Once the print is plainly visible, lift the print by getting some type of clear sticky film (tape can be a substitute) and placing it over the print
 
-Quickly tear print away from surface.
 
-Document print and record print type